Summertime!

Summer is coming and we are already thinking about fun activities to do with the kids. We are making our lists and checking them twice, but more than that we want to hear what is on your lists! Do you have some great activities and adventures planned for your kids this summer? Camping? Kids camps? Crafts? Festivals? Let us know and share them with other Ottawa parents.

If you are interested in writing a blog post for Kids in the Capital email us at kidsinthecapital@gmail.com with your ideas. Because we want to add your list to ours!

- Brie and Lara

Easy Birthday Cupcakes - A Mom's Lifesaver

by Isabelle I recently resuscitated an old trick of my mom's for those times where you're busy and you're expecting a bunch of kids to your house: ice cream cone cupcakes. I made them a few weeks ago for my little guy's fourth birthday, and they were a HUGE hit, with both kids and grownups.

Step 1: Prepare your favorite cake batter (or use a mix if you're short on time and ingredients)

Step 2: Pour the batter into flat-bottomed ice cream cones placed in muffin tins.

Step 3: Bake according to cupcake recipe directions (nothing special needed for the cones).

Step 4: Decorate and enjoy!

This is what my quickie cupcakes looked like:

For slightly older kids, an easy birthday party activity would be to frost the cupcakes themselves. With the 3- and 4-year old crowd, though, I picked a different activity and just let them enjoy the pre-decorated cupcakes :)

Isabelle is the mom of 3.5 year old Jay and two-month old Rosie. You can also find her at Dr. Peach’s Blog.

Birthday Crowns

by Vicky Here's a fun little craft to make for your kids' birthdays! I found a pattern with instructions online, but I modified it slightly to make it a bit easier.

Materials needed:

-Crown Pattern -1/4 meter of felt (at least two colours) -1/4 meter of contrasting cotton fabric -buttons or sequins (or other embellishments/notions to decorate) -rick rack or ribbon -thread in a contrasting colour -stiff double sided iron-on interfacing -sharp sewing scissors, pins -non-rolling 3/4 inch elastic (at least 6 inches) -jar lid or something round to trace

Cut out the pattern, pin it and trace it on the felt. Use sharp scissors to cut it out. 

Next you will want to add your embellishments to the top of the felt. I chose to use buttons and sequins, but you can add whatever you like.

I traced around a small star shaped cookie cutter for my stars, and sewed them by hand.

I traced around a small jar lid to make my circle, and drew the numbers by hand. I then zigzagged around the number 1 in the center of the circle, and used a very tight zigzag stitch around the circle in the center of the crown. You can also add another circle with the child's initial to the back or side of the crown using the same technique. This is where you can get as creative as you like; put your child's initial, polkadots, stars, or whatever you like. 

How much elastic?


The crown without elastic measures 14 inches, so you will need to add some elastic at the back. To determine how much elastic you will need, measure your child's head, and then subtract 14 from that number. Add 1 inch for seams, and cut the elastic to that length.

Sew the elastic 1/4 inch from the bottom of the crown.

Add the rickrack or ribbon at the bottom.

Assembling the crown layers

Now you will layer your backing fabric, the interfacing, and the felt layer face down. Pin them together. Using a warm iron on the fabric side, iron the three pieces together. Make sure to leave a small opening where you can insert the other end of the elastic. (I staggered them in the photo so you could see all three layers, but you will want them to be directly on top of each other).

Cut out the crown.

Next you will insert the elastic into the other end of the crown, and sew it up. You may want to go back over with the iron to re-seal the opening that was left for the elastic.

Voila! Now your birthday child has a crown fit for a king or queen!

Vicky is the mom to 3.5 year old son named Joel and 9 month old daughter named Mieka. You can read her blog at blog Some Kind of Wondermom.

ABC Challenge : week 8

by Lara Congratulations to Stella who won my contest for participating in this week's challenge!!!  I'll be in touch! Now, everybody keep up the good work! Be creative, set new stages, see what you can come up with. We're more than halfway through the challenge!! :)

We're having a weekday meetup, (which I know won't work for everyone but we'll have another one at the end on a weekend, I promise) on June 16 at Parliament Hill at 9:30am. If you want to join us we'd love to see you! There's a bit more discussion going on about it on flickr.

Photography tip

This is anything but rocket science, but I think sometimes we need a reminder.

Print your photos!

I realized at one point that I hadn't printed any new photos in something like 15 months! You're taking lovely photos, print them, put them on your walls, give them to the people you love!

This last week I made a point to print some of my latest favourites and put them up on the wall. I'm thrilled every time I look at them. SO much better than just having them in my computer.

Which leads to another question. Where do you have your photos printed? I generally either order mine through Kodak Gallery (where I've stored my photos for something like 7 years) or at Costco (who is having a 10 cents a print sale until June 6).  I know some people use more professional places to print their photos. Do you find a big difference? Discuss!! :)

Also, I want to post about some great spots in Ottawa to take photos of (your) kids.  Email me (lara.wellman(at)gmail(dot)com) if you have a great spot (and maybe include a photo) and I'll post them over the next couple of weeks as part of my photography tips.

My two picks for this week

(brought to you by our new playstructure ;)

T is for trees T is for trees

I is for inside I is for inside

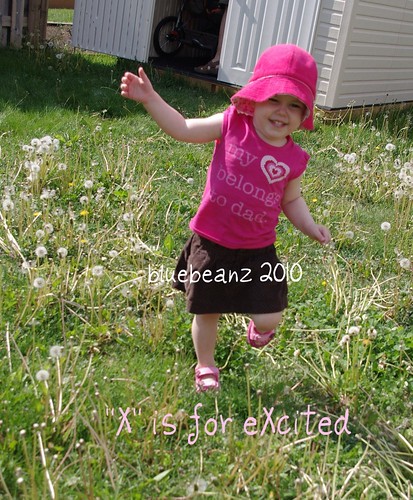
Participants' photos X for excited X is for Xcited by Bluebeanz Aww. She really does look Xcited ;)

Q for Quiet Q is for Quiet by somekindofmom. I miss these sweet moments. My guys are a mile a minute lately.

Y is for Yellow-Mellow

Y is for yellow by lillypilly. I love this. Great punch of colour!

As always, it’s never to late too join the challenge. We hope you’ll play along!

Lara is the mom to 3.5 year old Kiernan and 1 year old twins Quinn and Juliette. You can find her at her blog Gliding Through Motherhood.

A Steam Train Adventure

by Krista This past Victoria Day weekend my 2 year old son and I decided to join some out-of-town friends and go on the Hull - Chelsea - Wakefield Steam Train excursion. The train is one of Canada's last remaining authentic steam-powered engines and travels through the Gatineau Hills covering 64 km of beautiful scenic views along the Gatineau river.

From start to end our journey was a pleasant experience beginning with the friendly staff directing us into the parking lot in an orderly fashion. Picking up our tickets and finding our assigned seats was a breeze thanks to the ticket agent's detailed directions. Each train car had a tour guide that pointed out landmarks and interesting facts during the ride. All the guides were kid friendly and always smiling.

The whole experience basically takes up the entire day. They advise that you arrive 45 minutes before the train departs, which is at 10:00 am sharp. This gives you lots of time to pick up your tickets, take pictures of the train and find your seats. The ride to the village of Wakefield and back takes 90 minutes each way including a 2 hour stopover.

The ride to our destination passed by quickly with the guide handing out colouring books/crayons and musicians making their way through the train playing classic Quebec folk songs with a few recent hits mixed in. My son bounced happily in his seat to the music while waving out the window to bystanders watching the train make its way through the Gatineau Hills. We walked through the train to the souvenir car to buy a toy locomotive, which he played with for the remainder of the trip.

The stopover in Wakefield began with the tradition of the musicians pushing the Steam Engine around 180 degrees on the turntable. (View our video on YouTube) Afterwards, you were allowed to walk through the actual steam engine while the engineer went about his business of preparing for the trip home. My son was thrilled at the chance to see the inside the steam engine!

There was a small park with picnic tables and benches next to the train station where we had our lunch. You can opt to buy a box lunch or bring your own. There are all kinds of restaurants and take out stands to grab a bite if picnics are not your thing. After our lunch and some running around the park we made our way to the Wakefield Bakery and bought some yummy cookies and bread for the ride home. We then sat and enjoyed some ice cream while we waited for the train to blast it's horn to let us know it was time to make our way back for our journey home.

The ride home was a little quieter since my son was tuckered out from all our walking (re: running) around the village. There is room in each train car to store your stroller if needed. If I had known that, I would have brought our umbrella stroller to make getting around the village a little easier. The musicians made another appearance and a girl making balloon animals and face painting paid us a visit. I had packed a book that my son had never read before to keep him happy for the final leg of our trip home. It seemed to work... but I think the cookies I bought in Wakefield might have been the real winner!

The pricing changes from season to season and is very specific. They have special prices for seniors, students, children and a family rate. Kids 2 years of age and under are free and they get their own seat.

For more information visit their Web site.

[youtube=http://www.youtube.com/watch?v=58grR_TnHEA&feature=player_embedded]

Krista is mom to three boys: 2 year old Ewan and 9 month old twins Angus and Lachlan. You can follow her on Twitter @kristahouse.