Will it grow? Experiments for kids in growing vegetables

I’m not an avid gardener but I’ve been having a lot of fun in the last while learning what I can and can’t grow - part of it is experimentation and getting ideas from the internet so I thought I’d share a few of the things I’ve seen, have tried, and am currently trying to see if it inspires you!

Growing vegetables.png

A mini window greenhouse

This idea from Tiktok is a simple activity that’s fun to try out with little kids to see things grow. I haven’t personally tried this one out but it’s one I would have loved to try with my kids when they were younger so wanted to share.

It’s simply a ziplock bag, wet paper towel, seeds and some construction paper!
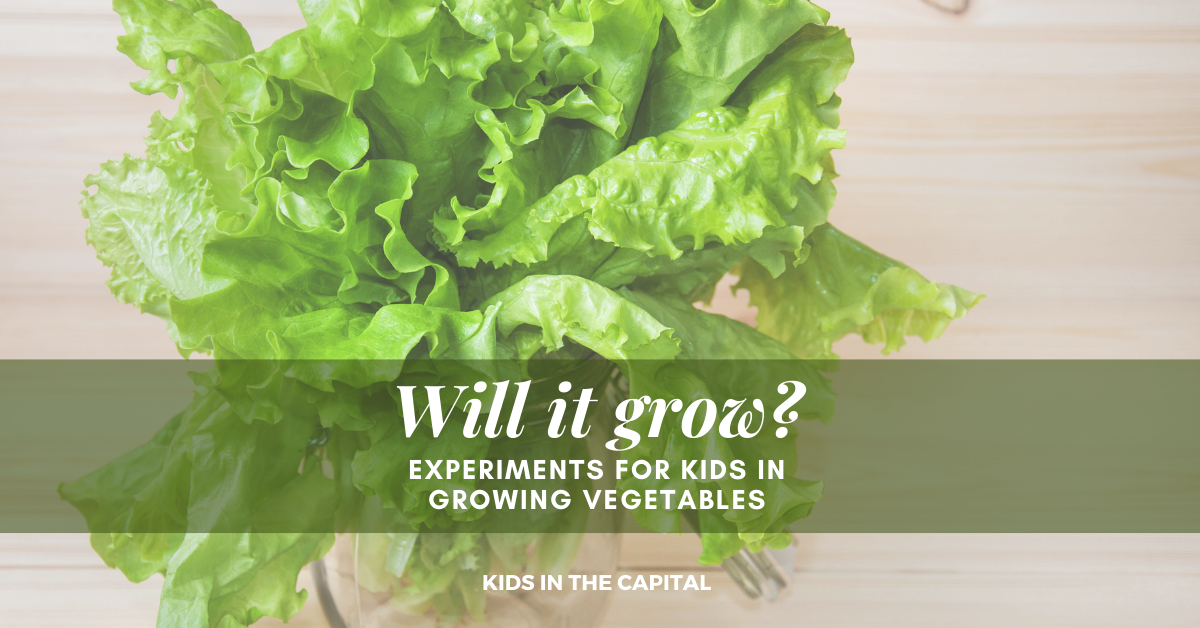
Regrowing lettuce

I’ve never done this long enough to eat the lettuce, but the watching the lettuce regrow is always fascinating to me (and even my tweens). Based on this article I may try romaine next time! It’s as simple as cutting off the bottom of your store bought lettuce and sitting it in some water. This is about 3 days out for this iceberg lettuce regrowth. As more browns I will peel off what’s dying away and more new green will replace it!

Lettuce bottom held in water by toothpicks with new growth popping in

Lettuce bottom held in water by toothpicks with new growth popping in

Planting old onions

Onion that has sprouted

Onion that has sprouted

Every time I find a sprouted vegetable in my kitchen I’m now curious if I can replant it! I did a bit of research and have now attempted to regrow onion!

Here’s what I learned.

Step one - find an old onion that has spouted - don’t throw it away!

Sprouted onion partially peeled down to centre

Sprouted onion partially peeled down to centre

Step two - peel back the onion - all the way down, and you’ll find multiple onions to regrow. I had two, but it sounds like there are often more in an onion. Leave the roots on the onion.

Sprouted onion peeled down to centre, ready to be cut into two

Sprouted onion peeled down to centre, ready to be cut into two

Step three - once you get all the way down, cut apart the onions using a knife.

Pieces of sprouted onion planted about one inch deep.

Pieces of sprouted onion planted about one inch deep.

Step four - plant about an inch deep in soil (I was worried about planting them right into the garden when we might still get below freezing so I planted them in a bucket for now, but it does seem that they are able to withstand up to -5C (20F) so it might be ok to plant them right into your garden now. )

Step five - Keep them well watered wait about 3 months and then you probably (maybe) have onions! They are ready to harvest when the necks are soft and bending over. If they’re still standing up straight leave them to grow a while longer.

Let me know if you found this interesting and you’d like to hear about more of the things we attempt to regrow and how we do it! Our pineapple plant from last year is still doing great and I’m hopeful in a year or two we’ll get a tiny little pineapple from it too!

Worm composting made easy

About a year ago a friend of mine asked if I would like to start a worm compost (vermicompost) in my basement. At first I was reluctant because… worms in my basement. But since I am an avid vegetable gardener who uses compost, the idea of making it myself was appealing. Worm composting is not nearly as difficult or time consuming as one may think – and the result… well, just wait until you see this year’s seedlings!

What is vermicomposting?

In it’s simplest form, vermicomposting or worm composting, transforms food waste into nutrient-rich compost using worms (in particular, red wigglers).

How to get started with worm composting

First things first:

1)   No. Worm composting does not smell.
2)   No. You do not have to touch the worms if you do not want to.

Here is what we used to kick start my indoor worm compost:

1. Container: Doreen started me off with a plastic container that was about eight inches high. She had drilled holes in the bottom for ventilation and raised the bin on bricks to let excess liquid run out. She then put a tray underneath to capture the liquid, which you can use for fertilizer (think of it as high octane fertilizer!). The container also had a tight lid to not only keep light out, but also keep the worms in.

top half of compost bin with screened breathing wholes

2. Bedding: We then filled the bin three-quarters full with finely shredded newspaper, broken up eggshells and a bit of soil. We then moistened this with a bit of water and mixed it all up loosely to allow for good air flow.

3. Worms: Doreen then dumped in about a pound of red wriggler worms. Red wrigglers are low maintenance forgiving and like to eat! So, no, you do not use earthworms for composting purposes.

4. Where to keep your worm bin: I keep my bin in my unfinished basement, where it is cool, not cold and not too warm either. It is also not in direct sunlight (worms hate direct light).

My counter compost container (it has an air tight lid)

5. Feeding and caring for your worms: I keep a compost container on my kitchen counter (as well as a larger one under my sink). When it is full, I “feed it to the worms,” which is about once a week. I simply go down, open the lid, pick a corner, dig a little hole, dump the food waste, cover it up and go. Admittedly, I also love looking around to see how the worms are doing. I look for eggs (they’re usually in avocado shells) and worm clusters (this way I can tell what they really like to eat). Note: I leave a little marker of some kind (a lid or something small) that I place on top of the corner that is next for me to put food in. This way the food is evenly distributed.

If the bin starts to give off an unpleasant odour or if your worms are trying to escape (you will see lots on the lid), the bedding may be too wet. Stop feeding them until the worms catch up and gently stir the contents to increase airflow.

Worms working hard to break down waste; you can still see some of the original paper in here

Weeks later the compost is looking good!

6. When and how to use your compost: In a couple of months you will start to see all the paper and dirt turn into compost. It’s quite miraculous, really. You can then mix your worm compost with potting soil for potted plants, add it to your garden soil, and use it when transplanting seedling from indoors to outdoors for a little extra nutrients to ease the stress of the climate change.

I now have both an indoor and outdoor worm compost. I upgraded my indoor worm compost to a “Worm Factory” because my worms outgrew my starter bin, and my husband built our outside worm compost. I dump food in our outdoor worm compost all year long (of course, it doesn’t break down in the winter, but come spring – it breaks down really fast!). And no, our outdoor compost bin does not smell! The worms do a great job of breaking down the enzymes responsible for odours and if it does start to smell, I just go in with a pitch fork and mix up the compost to allow for more air to get in.

worm factory

Can I move my outdoor worms inside and vice versa?

Yes, when it is time to bring your worms inside, you can spread out the compost on a tarp on a sunny day and move it around until you see the worms scramble to find darkness. Take those worms and put them in an inside worm compost (you can start your indoor compost again, starting with step one). We did this last fall when it was time for our indoor worms that we put outside for the summer to come back inside. This year I think we will continue to have an outdoor and indoor compost.

Worm composting at home is just as fun and educational. A part of my daughter’s chores involves feeding the worms and giving me a status check, which is usually a “they’re fine” or “one was on the lid, but I just put it back in.”  She has also learned the ins and outs of composting – a skill I hope she will come to appreciate as an adult.

If you’re not convinced that vermiculture is for you, just remember that worm composting reduces your garbage and your reliance on city composting. There is also something gratifying about managing your own organic waste, making your own compost and watching your worms grow and multiply. Honestly though – it’s fun!

The Vegetable Gardener and The Art of Seed Saving

A couple of years ago, after seeing a pattern in the kinds of vegetables my family and I like to grow in our vegetable garden, I decided to look into seed saving to see if I could reuse various seeds from our family's homegrown favourites.

When I started seed saving, I wasn’t sure what I had to do before preserving them or if I could just through them in a Ziplock bag (or the freezer) and forget about them until spring.

Luckily, there are resources dedicated to teaching keen gardeners how to preserve their seeds so they can use them again. USC Canada is an organization dedicated to the preservation of seeds as well as the sale and consumption of good (ecological) seeds—non GMO seeds, and non hybridized seeds that still maintain their flavour and nutrients.

USC Canada has a handy seed saving document that not only details seed harvesting information, but also information on how to clean the seeds as well as how long the seeds will maintain their viability. For example, did you know you can store carrot seeds for three years and tomato for five years?

Seed saving is not difficult or time consuming. Once you have mastered it, saving seeds will save you money (and the time it takes to remember to order or go to the store and purchase them every spring).

What you need to know to save seeds

The procedure to save seeds depends on the type of fruit or vegetable, but, for example the tomato – if you are like me you probably have an over abundance of tomatoes at the end of the growing season. Well, take one or two of your overripe, soft tomatoes and scrape out the jelly with seeds into a jar and cover with water. Leave it to ferment for three or four days (or until it gets mouldy). Then decant with new water and throw away any floating seeds – only keeping the ones that did not float. Then spread them on a paper towel and let them dry out for about a week. Then put them in a paper bag or envelope and store them for up to 5 years! The key is to make sure your seeds are completely dried out before storing them.

Why save seeds

In addition to saving money, by saving seeds you are helping to preserve the genetic diversity of fruits and vegetables.

By saving seeds from fruits and vegetables that grow well and eventually building up enough stock to rotate what you grow in your garden every year, you are helping to maintain genetic seed diversity and keep various species of fruit and vegetable plants alive and well.

How to get the kids involved

Getting your children involved is a great way to get them interested in the environment, food, and sustainability. It's also a great way to show children where their food came from, and how they can produce it themselves (and keep producing it).

Younger children love to get their hands dirty! Let them help harvest the seeds from the chosen fruits and vegetables. You can also throw in some math lessons by having them help count the seeds.

Seed saving and recycling makes for a great science experiment for kids of any age and, regardless of how old you are, if you like gardening there is always a sense of pride and satisfaction when the first sprouts breaks out of the seed and dirt to say hello.

For more information on seed saving, as well as "good" seed companies (I buy mine from Cubit's Seed Co.), visit USC Canada.

Do you save seeds? From what fruits and vegetables? Leave a comment and let us know.