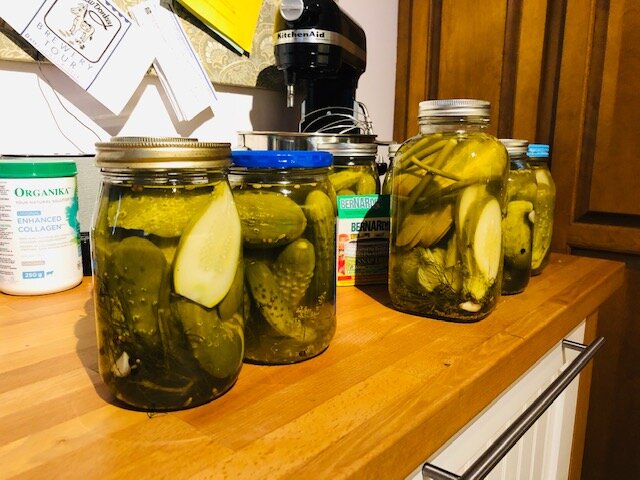
Dill pickle recipe
/Late July and August is pickling time in our house! I don’t tend to can a lot of things, but I always make space in my calendar for pickles. Our family eats a lot of pickles, and store bought just doesn’t taste the same. Plus, they make great gifts when you’re heading over to a friend’s or family’s house for dinner.
Another thing I love about pickles is that they don’t need a “canning bath” unless you’re trying to extend the shelf life to one year. The recipe I use has a shelf life of 6 months, given that bacteria has a hard time growing in so much vinegar!
The following recipe makes a fairly small batch (around 8-10 jars), and in years past I’ve doubled this to make closer to 20 jars. The entire process takes me about 3 hours depending on how many I make.
What do you need to get started?
Two large pots: one for sterilizing jars and lids, and one for making your brine
Wide-mouthed mason jars - I use the 1L, but you could also get half gallon jars if you want to go bigger (the following recipe makes about 10 smaller jars)
Tongs, oven mitts, clean dish towels (old rags work best!)
8 pounds of small pickling cucumbers
15-20 Flowering dill tops - easy to find in local markets, or ask friends with gardens! If you can’t find them, substitute with dill seed.
Mix of: peppercorns, mustard seeds, fennel seeds, coriander seeds, hot pepper flakes (you certainly don’t need all of these seeds, but I love the flavour it adds!)
2 bulbs of garlic if you like garlic (add 1-2 cloves per jar depending on the size of the clove and your love of garlic)
Step 1: Sterilize your jars
It’s really important that everything is clean and sterile so that you don’t have any nasty bacteria that will give someone botulism. You can either boil your jars for 10min (lids should go in the pot for less time or they get warped) or you can sterilize them in the dishwasher and just keep it on the dry setting until you’re ready to use them. Jars should also remain in the boiling water or on the dishwasher “dry” setting until you’re ready to use them.
Step 2: Make the brine
I actually do this step simultaneously with boiling of the jars. The recipe I use is from The Homemade Pantry - this is an amazing recipe book and I use it all the time!
4.5 cups apple cider vinegar
4 cups white vinegar
1 cup pickling salt
10.5 cups of water
Bring this all to a boil and it’s ready.
Step 3: Stuff your jars
Remove your jars from the boiling water and place them onto your towels. Wear gloves because they are hot!! I do two to three jars at a time because I don’t have a lot of counter space. Put about 1 tsp of your seed mixture, 2 cloves of garlic and 2 small (or 1 large) dill heads into the jars. Stuff them PACKED full with the cucumbers. I sometimes slice cucumbers because it’s hard to find small ones - you can either cut them in skewers or do sandwich pickles (cut flat and lengthwise so that they fit perfectly on your burger or sandwich)
Step 4: Cover with brine
Using a ladle and a funnel if you have one, fill the jars until 1/2 inch from the top. Cover with the lids. Place to the side and listen for the “pop” to indicate your jars have sealed (you can also press on the top to feel the pop of the metal, which would indicate they haven’t sealed) Reasons jars don’t seal: you haven’t filled them up enough with brine, or you accidentally boiled the lids for a long time and they warped (they should really just go in a separate bowl with hot water until you’re ready to use them, but I often throw them into the pot of boiling water) Any jars that don’t seal should become fridge pickles.
And repeat until you’re all done, your entire house smells like vinegar and you are a sweaty mess!! It’s so worth it though :)
NOTE: you can really pickle just about anything…last year we had an abundance of beans, so I pickled those, and this year we tried garlic scapes.


