Worm composting made easy

About a year ago a friend of mine asked if I would like to start a worm compost (vermicompost) in my basement. At first I was reluctant because… worms in my basement. But since I am an avid vegetable gardener who uses compost, the idea of making it myself was appealing. Worm composting is not nearly as difficult or time consuming as one may think – and the result… well, just wait until you see this year’s seedlings!

What is vermicomposting?

In it’s simplest form, vermicomposting or worm composting, transforms food waste into nutrient-rich compost using worms (in particular, red wigglers).

How to get started with worm composting

First things first:

1)   No. Worm composting does not smell.
2)   No. You do not have to touch the worms if you do not want to.

Here is what we used to kick start my indoor worm compost:

1. Container: Doreen started me off with a plastic container that was about eight inches high. She had drilled holes in the bottom for ventilation and raised the bin on bricks to let excess liquid run out. She then put a tray underneath to capture the liquid, which you can use for fertilizer (think of it as high octane fertilizer!). The container also had a tight lid to not only keep light out, but also keep the worms in.

top half of compost bin with screened breathing wholes

2. Bedding: We then filled the bin three-quarters full with finely shredded newspaper, broken up eggshells and a bit of soil. We then moistened this with a bit of water and mixed it all up loosely to allow for good air flow.

3. Worms: Doreen then dumped in about a pound of red wriggler worms. Red wrigglers are low maintenance forgiving and like to eat! So, no, you do not use earthworms for composting purposes.

4. Where to keep your worm bin: I keep my bin in my unfinished basement, where it is cool, not cold and not too warm either. It is also not in direct sunlight (worms hate direct light).

My counter compost container (it has an air tight lid)

5. Feeding and caring for your worms: I keep a compost container on my kitchen counter (as well as a larger one under my sink). When it is full, I “feed it to the worms,” which is about once a week. I simply go down, open the lid, pick a corner, dig a little hole, dump the food waste, cover it up and go. Admittedly, I also love looking around to see how the worms are doing. I look for eggs (they’re usually in avocado shells) and worm clusters (this way I can tell what they really like to eat). Note: I leave a little marker of some kind (a lid or something small) that I place on top of the corner that is next for me to put food in. This way the food is evenly distributed.

If the bin starts to give off an unpleasant odour or if your worms are trying to escape (you will see lots on the lid), the bedding may be too wet. Stop feeding them until the worms catch up and gently stir the contents to increase airflow.

Worms working hard to break down waste; you can still see some of the original paper in here

Weeks later the compost is looking good!

6. When and how to use your compost: In a couple of months you will start to see all the paper and dirt turn into compost. It’s quite miraculous, really. You can then mix your worm compost with potting soil for potted plants, add it to your garden soil, and use it when transplanting seedling from indoors to outdoors for a little extra nutrients to ease the stress of the climate change.

I now have both an indoor and outdoor worm compost. I upgraded my indoor worm compost to a “Worm Factory” because my worms outgrew my starter bin, and my husband built our outside worm compost. I dump food in our outdoor worm compost all year long (of course, it doesn’t break down in the winter, but come spring – it breaks down really fast!). And no, our outdoor compost bin does not smell! The worms do a great job of breaking down the enzymes responsible for odours and if it does start to smell, I just go in with a pitch fork and mix up the compost to allow for more air to get in.

worm factory

Can I move my outdoor worms inside and vice versa?

Yes, when it is time to bring your worms inside, you can spread out the compost on a tarp on a sunny day and move it around until you see the worms scramble to find darkness. Take those worms and put them in an inside worm compost (you can start your indoor compost again, starting with step one). We did this last fall when it was time for our indoor worms that we put outside for the summer to come back inside. This year I think we will continue to have an outdoor and indoor compost.

Worm composting at home is just as fun and educational. A part of my daughter’s chores involves feeding the worms and giving me a status check, which is usually a “they’re fine” or “one was on the lid, but I just put it back in.”  She has also learned the ins and outs of composting – a skill I hope she will come to appreciate as an adult.

If you’re not convinced that vermiculture is for you, just remember that worm composting reduces your garbage and your reliance on city composting. There is also something gratifying about managing your own organic waste, making your own compost and watching your worms grow and multiply. Honestly though – it’s fun!

How to get your kids involved with spring cleaning

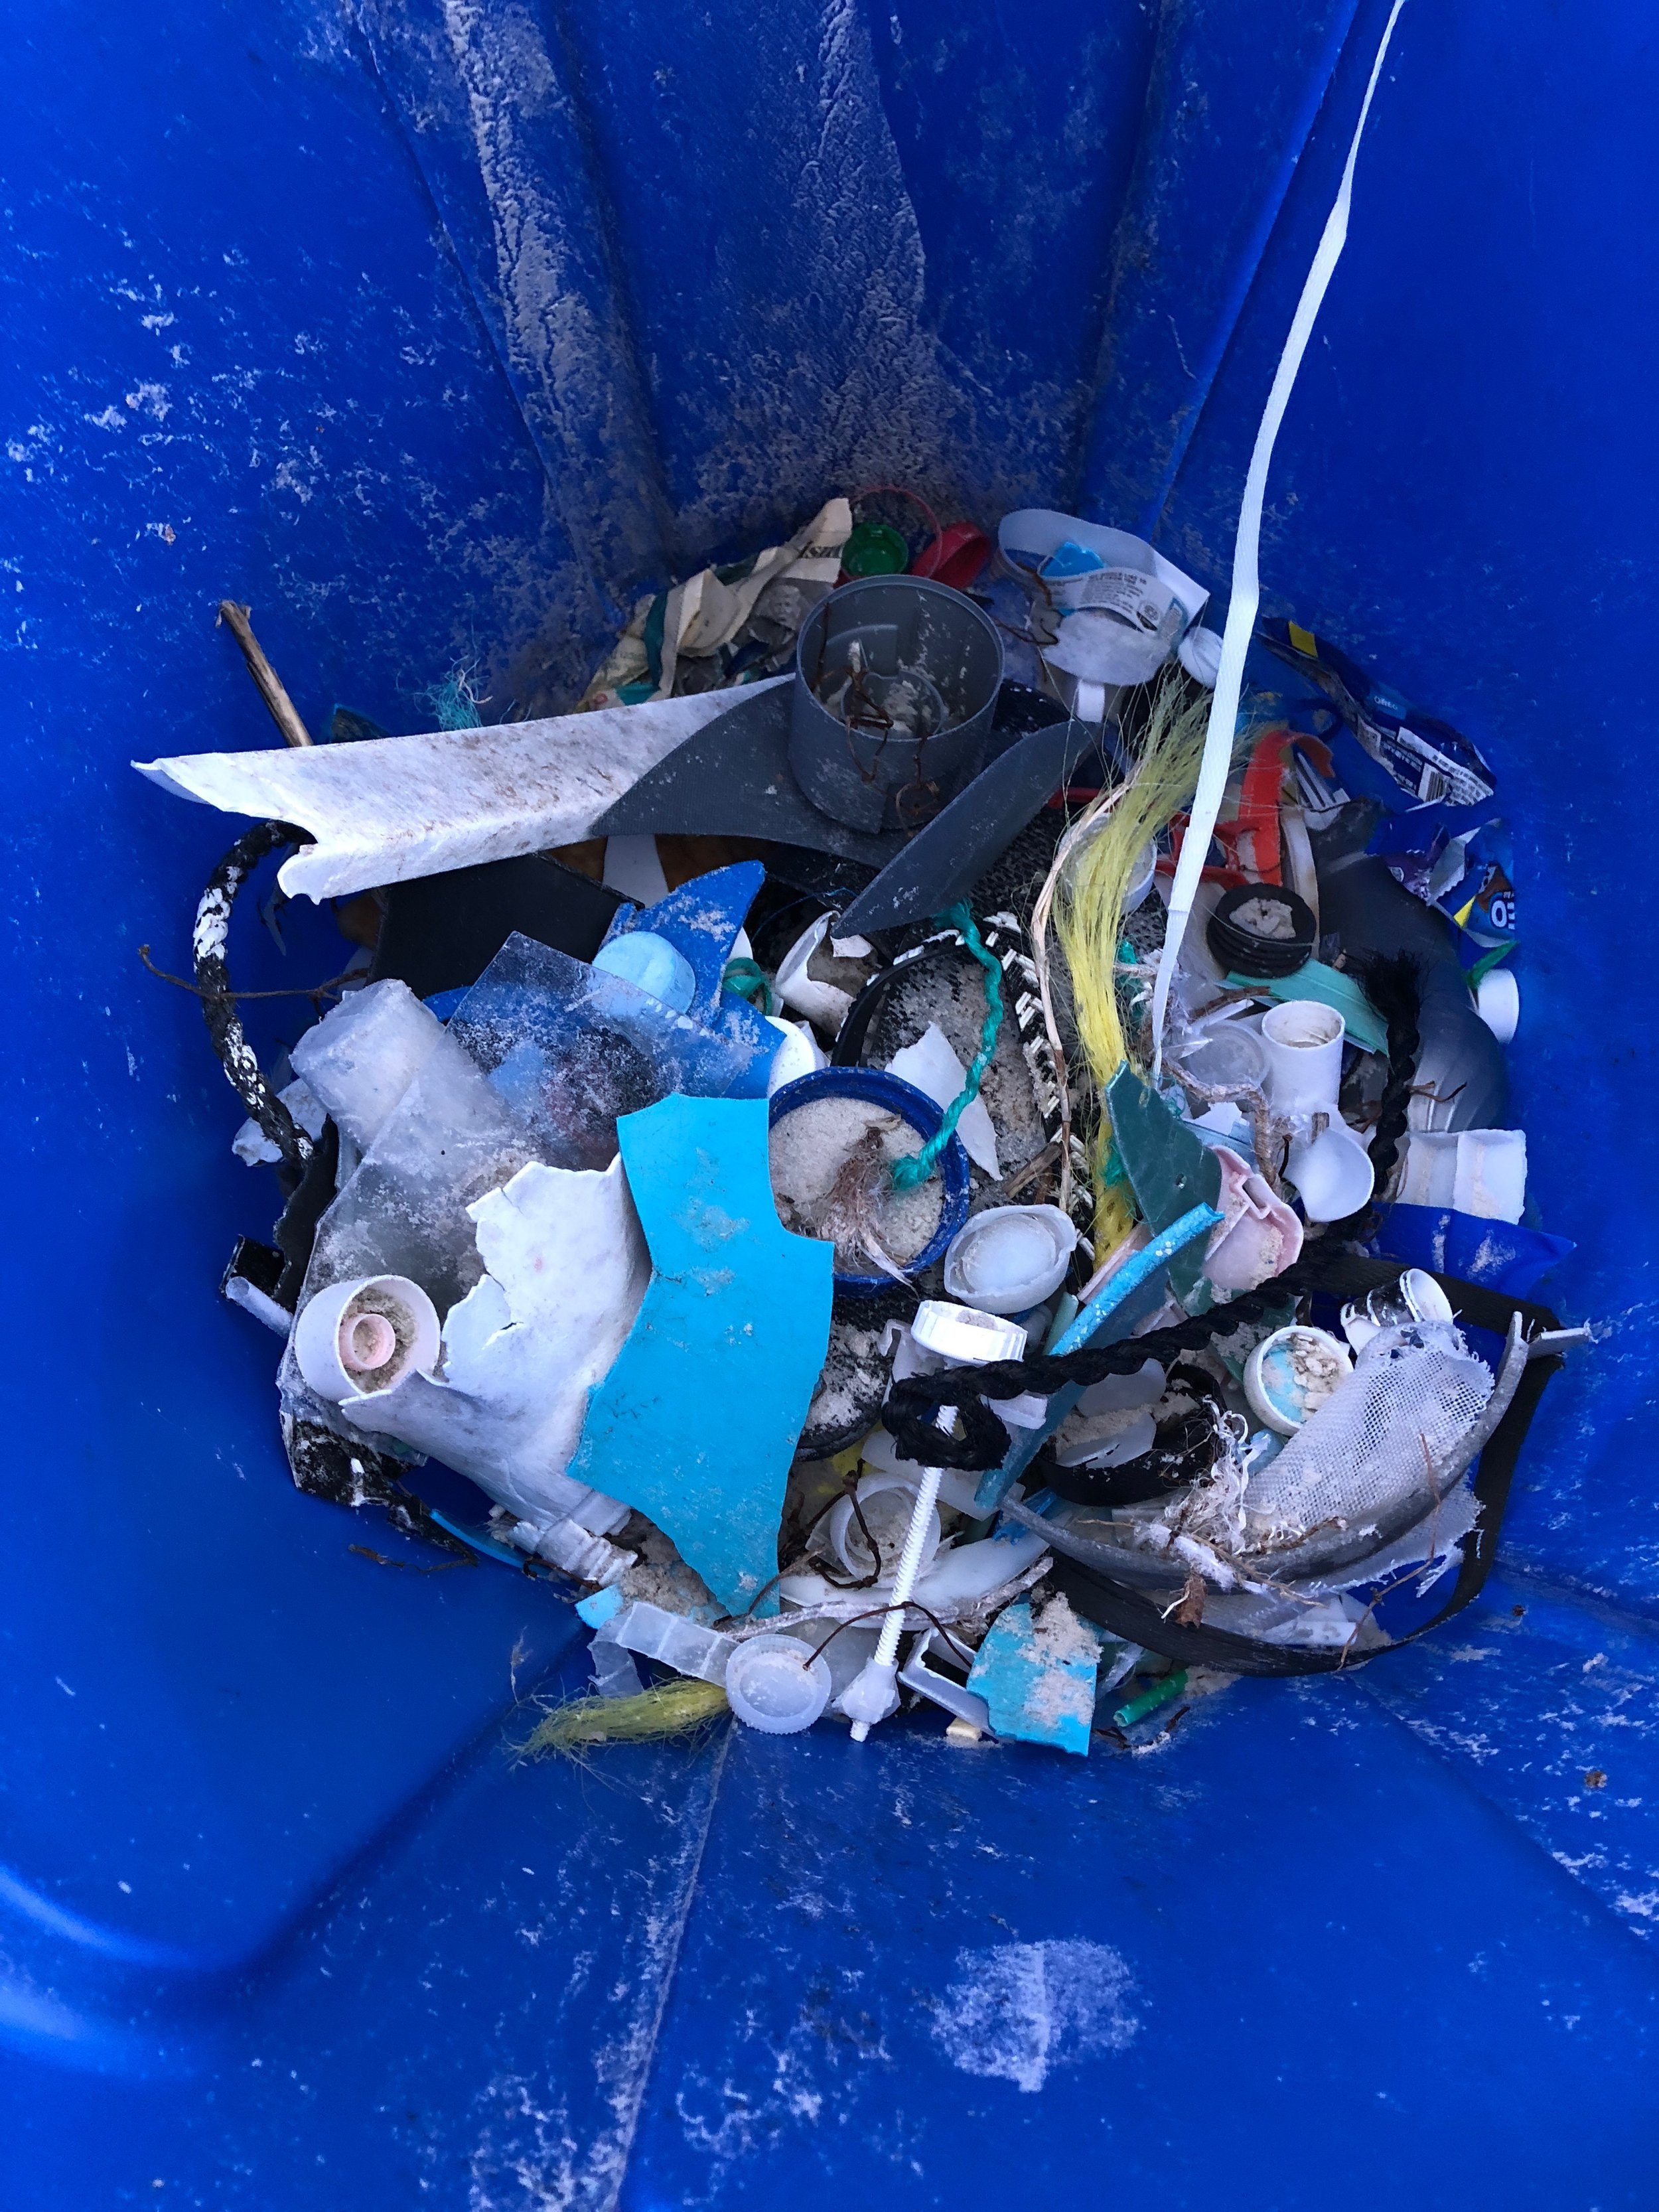
I recently returned from a trip to Daytona Beach where my family and I spent several evenings picking up garbage from the shoreline – plastic water bottles and caps, toothpaste caps, strings from helium balloons, and much more.

Garbage we collected from Daytona Beach 

My daughter enjoyed cleaning up the beloved beach she has grown up loving (my in-laws rent a condo there every year) because she hates seeing it so polluted with garbage. And, after visiting a sea turtle rescue hospital in Ponce Inlet, Florida, she was also upset by all the garbage being consumed by- and endangering ocean life.

Fast forward to home and thoughts of spring-cleaning. I grew up with spring-cleaning being about throwing out unwanted or unused goods, but times have changed. Instead of throwing out old toys, clothes and household goods, we resell, give away or donate unused items that are still in good shape – and I don’t just wait until spring to do this. I “spring clean” all year long!

“Buy Nothing” or “Free” Facebook Groups

Every season my family and I to go through our closets and shelves to see if there is anything we no longer use, but that is in good shape that we would like to donate. I try not to encourage selling smaller or lesser valued items because I just want them out of the house and on to someone who could appreciate them. We place these items in a box and then I post them one-by-one (or if it is a series or similar items, together) on my community “Buy Nothing” or  “Free” Group on Facebook.

These items are typically gone within a day or two. These free Facebook Groups make it easy to pass along unused items. I usually arrange for a “porch pickup” so no one even has to be home at the time of pick up.  You will be amazed at what you can give away – as well as what you can find in these Groups! A simple Facebook search for “free” or “buy nothing” followed by the name of your community should bring up your community group.

Have a garage sale

 Nothing teaches kids the value of their toys then encouraging them to have a garage sale with their old, unwanted toys that are still in good shape. I worked with my daughter to appropriately price her items.

My daughter couldn’t believe how much her collection of Shopkins went for as well as some of her book collections. It made her want to take better care of some of the toys she still plays with – understanding that they not only cost money, but that they may be worth money as well. She then used the money earned from the garage sale to buy something she had been saving for.

A garage sale is not only a great way to spring clean, but also teaches kids about money, and the advantages of taking care of their stuff!

Swap out “disposable” for “reusable”

The number of plastic straws we found on the beach was… disgusting.  It really made me think about the products we use, buy and thoughtless throw away. We no longer purchase plastic straws. Instead, I invested in stainless steel straws from a local company, Dalcini Stainless. You can purchase them online or at Terra 20 and while the initial cost may seem like a lot – they will last you forever! They are also easy to clean. I just store them with my other utensils, so everyone knows where to find them when they need a straw.

I have tried to reduce our overall plastic use as much as possible. Plastic bags are a great place to start. Believe me, if you could see the poor sea turtles recovering at the turtle hospital from consuming plastic bags they mistook for jellyfish you would stop using all plastic bags immediately. When I do get plastic bags, I make sure to recycle them. Some local retailers, such as Giant Tiger have plastic bag recycling bins.

Participate in Spring Cleaning Challenges

The City of Ottawa runs Spring Cleaning challenges every spring. It’s a great way to get the kids involved in cleaning up their neighbourhood and make them understand what happens when they through a candy wrapper on the ground at the park (that it doesn’t magically disappear).

My daughter and a few of her friends arrange their own park clean up every spring and are usually disgusted by the garbage they find. My daughter has become quite vigilant about making sure garbage is put in its place (and recyclables are recycled).

As our world becomes increasingly cluttered with “stuff” I believe it is important to teach our kids to minimize their use of plastic, as well as what happens when they don’t care about trash. We need to show them how to help make the world a cleaner place – for all living creatures. After all, we want it to still be around for the next generation of beach goers!

5 Earth Day Activities for Kids

April 22nd is Earth Day, a day to celebrate nature, get outside, purposely do something “green,” and it's a great opportunity to teach children how they can do their part to help preserve and protect our planet. And while crafts can be a fun way to learn about Earth Day, getting your children involved (and outside) is even more fun!

Plant a tree

When my daughter was one we started an apple tree from seed. We nurtured it indoors until it was ready to be planted outside and now it’s the same height as her. There is nothing more educational or rewarding then watching a tree sprout and grow from seed or seedling. If you plant a tree, take the time to explain to your children why trees are so important (their ability to absorb carbon dioxide), and let them know it will grow up just as they do. My daughter loves measure herself against our little apple tree.

Build a bat house

I got the idea to build a bat house from the Wild Kratts, but I love it because it gets kids closer to a creature some may find scary. Building a bat house is not hard (here is a link to the bat house mentioned in the Wild Kratts). As with tree planting, building a bat house is a great opportunity to teach kids where bats fit into our ecosystem and why they are important. They eat insects and in many parts of the world they are also plant pollinators.

Collect garbage

Grab some garbage bags, put on some gloves and head to your local parks and trails and start cleaning up! The windy winter always leaves a lot of garbage behind—Earth Day is a great opportunity to get outside and clean up the neighbourhood. While picking up garbage you can explain how garbage can be damaging to wildlife, including how they can get stuck in plastic containers or cut themselves on glass.

Plant a monarch butterfly garden

Monarch butterflies are endangered, so why not plant a monarch butterfly garden and teach kids what plants they are attracted to and why butterflies are important! Plant some milkweed so the monarch butterfly can lay its eggs on it and so their caterpillars have something to eat (did you know they only like milkweed? Luckily, many garden centres now sell this once hard to find plant seed). Like bees, butterflies are pollinators, so their existence is very important to the survival and success of our own food sources.

Have an earth day scavenger hunt

This is a great activity for younger kids. Create a scavenger hunt based on things found in nature, such as pinecones, rocks, flowers, and leaves. A nature-based scavenger hunt is a good way to help younger children learn more about nature as well as get them outside! Another idea is to go to your local library and find a bird watching book, then go for a hike and see how many kinds of birds you can spot and make a list!

There are many ways to get your children involved in learning about, appreciating, and protecting our earth. It can be as easy as religiously recycling, using reusable bags and making a conscious effort to conserve water. By taking the time to teach them now, they will hopefully carry this knowledge with them and share it for generations to come.

How do you celebrate nature and make Earth Day fun and educational for your kids?

The Vegetable Gardener and The Art of Seed Saving

A couple of years ago, after seeing a pattern in the kinds of vegetables my family and I like to grow in our vegetable garden, I decided to look into seed saving to see if I could reuse various seeds from our family's homegrown favourites.

When I started seed saving, I wasn’t sure what I had to do before preserving them or if I could just through them in a Ziplock bag (or the freezer) and forget about them until spring.

Luckily, there are resources dedicated to teaching keen gardeners how to preserve their seeds so they can use them again. USC Canada is an organization dedicated to the preservation of seeds as well as the sale and consumption of good (ecological) seeds—non GMO seeds, and non hybridized seeds that still maintain their flavour and nutrients.

USC Canada has a handy seed saving document that not only details seed harvesting information, but also information on how to clean the seeds as well as how long the seeds will maintain their viability. For example, did you know you can store carrot seeds for three years and tomato for five years?

Seed saving is not difficult or time consuming. Once you have mastered it, saving seeds will save you money (and the time it takes to remember to order or go to the store and purchase them every spring).

What you need to know to save seeds

The procedure to save seeds depends on the type of fruit or vegetable, but, for example the tomato – if you are like me you probably have an over abundance of tomatoes at the end of the growing season. Well, take one or two of your overripe, soft tomatoes and scrape out the jelly with seeds into a jar and cover with water. Leave it to ferment for three or four days (or until it gets mouldy). Then decant with new water and throw away any floating seeds – only keeping the ones that did not float. Then spread them on a paper towel and let them dry out for about a week. Then put them in a paper bag or envelope and store them for up to 5 years! The key is to make sure your seeds are completely dried out before storing them.

Why save seeds

In addition to saving money, by saving seeds you are helping to preserve the genetic diversity of fruits and vegetables.

By saving seeds from fruits and vegetables that grow well and eventually building up enough stock to rotate what you grow in your garden every year, you are helping to maintain genetic seed diversity and keep various species of fruit and vegetable plants alive and well.

How to get the kids involved

Getting your children involved is a great way to get them interested in the environment, food, and sustainability. It's also a great way to show children where their food came from, and how they can produce it themselves (and keep producing it).

Younger children love to get their hands dirty! Let them help harvest the seeds from the chosen fruits and vegetables. You can also throw in some math lessons by having them help count the seeds.

Seed saving and recycling makes for a great science experiment for kids of any age and, regardless of how old you are, if you like gardening there is always a sense of pride and satisfaction when the first sprouts breaks out of the seed and dirt to say hello.

For more information on seed saving, as well as "good" seed companies (I buy mine from Cubit's Seed Co.), visit USC Canada.

Do you save seeds? From what fruits and vegetables? Leave a comment and let us know.


Quick and Easy Guide to a Veggie Garden

Gardening can sometimes seem daunting, and just a teeny bit terrifying.

I'm here to tell you that it doesn't have to be that way! We make it more complicated than it has to be. If you have a little patch of dirt that you've been eyeing, then now is the time to sow your seeds (or plants!) and get started!

I'd like to share some answers to commonly asked questions we get about our vegetable gardens. Yes, our gardens are quite large, and we grow a lot of stuff. But you don't HAVE to start out big, and in fact, a small garden may be just what your family needs. And if you happen to catch the veggie gardening bug, well then I've done something good in this world after all.

Is it too late to start?

We live in Ottawa, land of the cold, so early June is definitely not too late! It's true that some plants do well in colder temperatures (fragile greens tend to wilt in the heat,) but many plants are happy to bask in the sunshine. We're still planting seeds now, and will be putting in our seedlings (baby plants) this weekend.

Where do I begin?

Start by thinking about the three things your plants need - soil, water and sunshine. First, assess the location of your patch. Is it in full sun all day, or partial shade? That will help determine which vegetables you should choose. If you are REALLY starting from the beginning (i.e. you want to dig up some grass to actually get to the dirt,) I would suggest this really cool method to save yourself back-breaking work of grass removal. This is also a great way to kill weeds if you don't feel like pulling them.

This next step isn't necessary, but you may want to consider getting a bit of compost to mix in with your soil. And remember to use your grass clippings, leaves and food scraps (no meat or fat) to feed your garden.

Finally, you'll need a source of water nearby (duh) Hopefully you have a hose, or are willing to lug some buckets when needed!

What should I buy?

You really don't need much. A nice pair of gardening gloves will save your hands, a good shovel and trowel. 

As for whether you should start from seed or buy the baby plants, that's totally up to you. If you're reading this now and have decided to start right away, you will probably want to head to a garden centre and get some seedlings. That said, I'm still throwing seeds around like nobody's business! 

We have sadly failed at growing seeds in our home...it's a tricky business, but I'm hoping some day we will get the hang of it!

What do I plant?

This is entirely up to you and your patch location! Most veggies do well in full sun. Start with some simple things - herbs, radishes, and kale are three that I find grow easily and seem pretty pest resistant. Cherry tomatoes are great for kids! A note that squash and zucchini will take over your garden because they are GIANT plants. Think about the vegetables your family likes to consume on a regular basis, and choose from that list. Remember, though, that some of the vegetables we buy are trucked in from much warmer climates and may not grow well here.

What if I kill my plants?

I promise, if you water and maybe do a little bit of weeding, most plants will be fine (but if you have rabbits, I do feel your pain - you may need to consider some chicken wire fencing.)

Gardening is fun and exciting, and part of that comes from never knowing what you're going to get! Will something fail miserably this year? Will you run into a pesky beetle that kills all your cucumbers? Will the one veggie you thought would not work suddenly win the race? Year after year we make notes of what worked and what didn't. A "green thumb" is something that you develop over time, but even experienced gardeners can't control the environment. So don't worry about killing anything, and just have fun with it! 

Finally, make sure to involve the kiddos. Probably too obvious to say, but kids LOVE gardening. Who doesn't like getting dirty, spraying hoses and pulling stuff out of the dirt? Also, veggie gardens are a sneaky way to get your kids to eat their vegetables. Ever since they could eat solids, my babies have been pulling stuff out of our gardens as snacks. They are now quite adventurous when it comes to trying new vegetables!

Do you have a veggie garden? What made you want to start growing your own food?