
Painting with Marbles
/by Sara Every two weeks I volunteer in my son's Junior Kindergarten classroom and I will admit that it's a great source of inspiration for art and craft projects.
On my most recent visit we used marbles to paint pictures, something even I remember doing in elementary school!
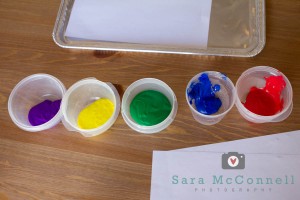
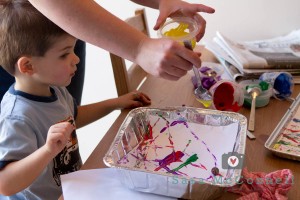
Once you decide how many colours you'd like to use, choose small containers to pour the paint into. You only need enough paint to cover a marble.
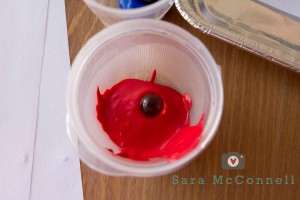
Place a marble into each container and use a plastic spoon to cover the marbles with paint. We used our 'for food' spoons and it was a bit of a disaster: they were too heavy and kept tipping the paint containers over and spilling the contents all over the kitchen table.
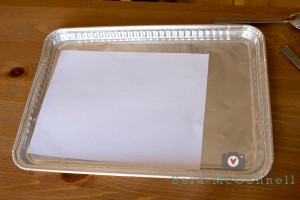
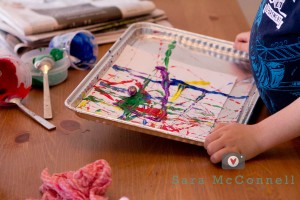
We used three different tin trays for this project: one with shallow edges, one with edges that were about 1.5 inches high, and another with edges over 2 inches high.
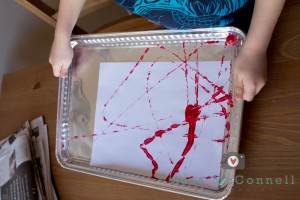
Whether or not the marble will fly out of the tray (which it did from all 3 of our trays) depends more on the enthusiasm with which the painter rolls the marble around than the depth of the tray. Although based on the enthusiasm to depth ratio, I'd suggest the 1.5 inch deep tray :)
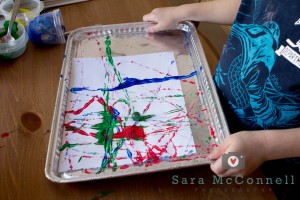
While we rolled the marble around we talked about the directions you could move the tray in (in a circle, square, back and forth, side to side) as well as the colours we created by mixing different colours of paint.
Even the 2.5 year old monkey got in on the marble rolling action. Despite giving him the deepest tray he still managed to launch the marble onto the floor the most frequently!
This is definitely a messy activity so I'd suggest a table in the kitchen away from the walls (when the marble launches it tends to splatter) but I think that the colourful paintings we created were well worth the mess!
Sara is a photographer and mom to a 5-year-old ” firefighter” and 2.5-year-old “monkey”. You can also find her at her blog, My Points of View.


