DIY Toys: Fun for Hours!

I got this idea (well kinda definitely copied the idea) from my sister in-law when babysitting her boys a few weeks ago. It’s so simple and so easy to do....and it will entertain your little one(s) for hours!

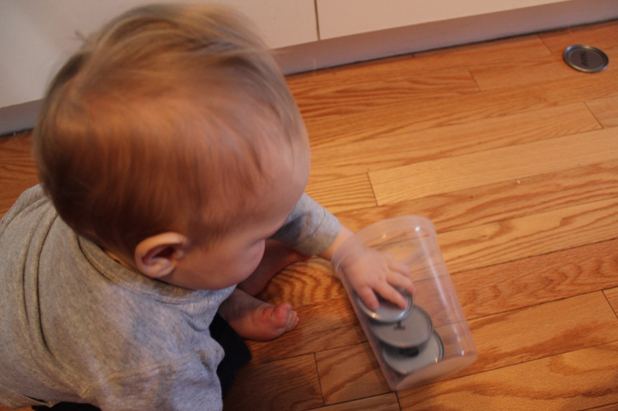
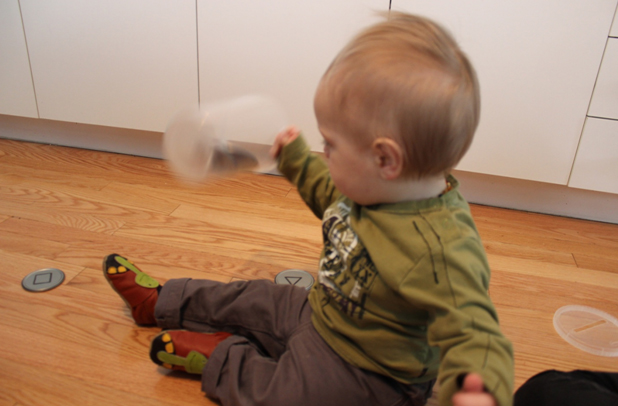
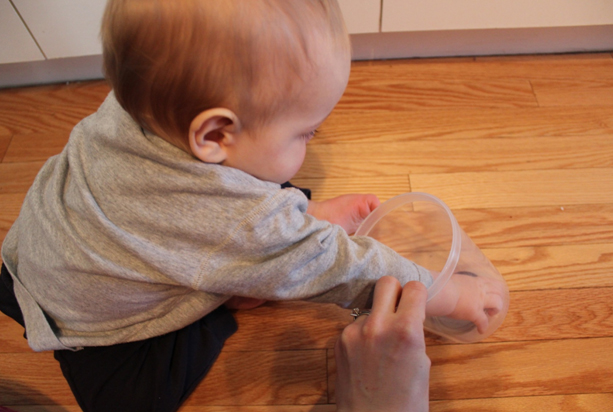
Why wouldn’t it be fun? It clangs, you can shoot the discs across the room on the floor, put the disks in...pull them out, drop them in, shake it about. So.Much.Fun.
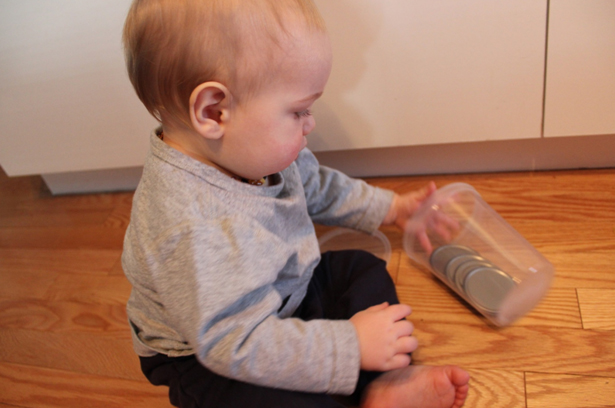
Fin agrees.

And I had fun watching him explore and do all the actions listed above, over and over again.

My sister in-law used a Pringles can for hers, and has a TON of the metal disks. She swears her boys, now 3 and 6, have had hours of fun playing with this game. And she has had it around for a few years now...so it’s great for such a wide age range.

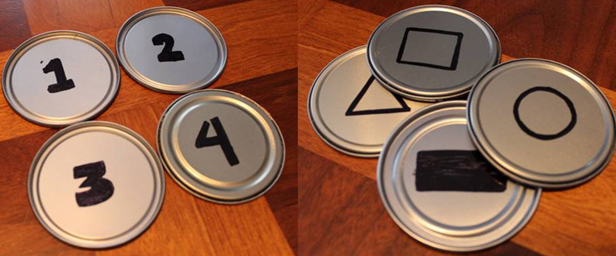
Fin is 10 months old, and he had a blast with it all morning (and then later in the afternoon, in case anyone was noticing the wardrobe change). It’s a little early for Fin right now, but I’ve started labeling the disks with numbers and shapes to increase the learning factor.

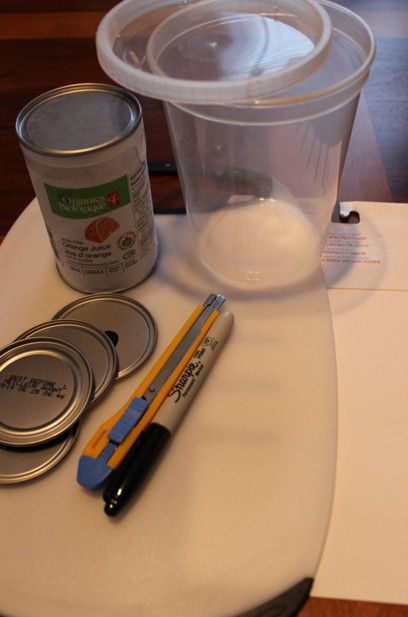
So, what do you need to put this simple game together?

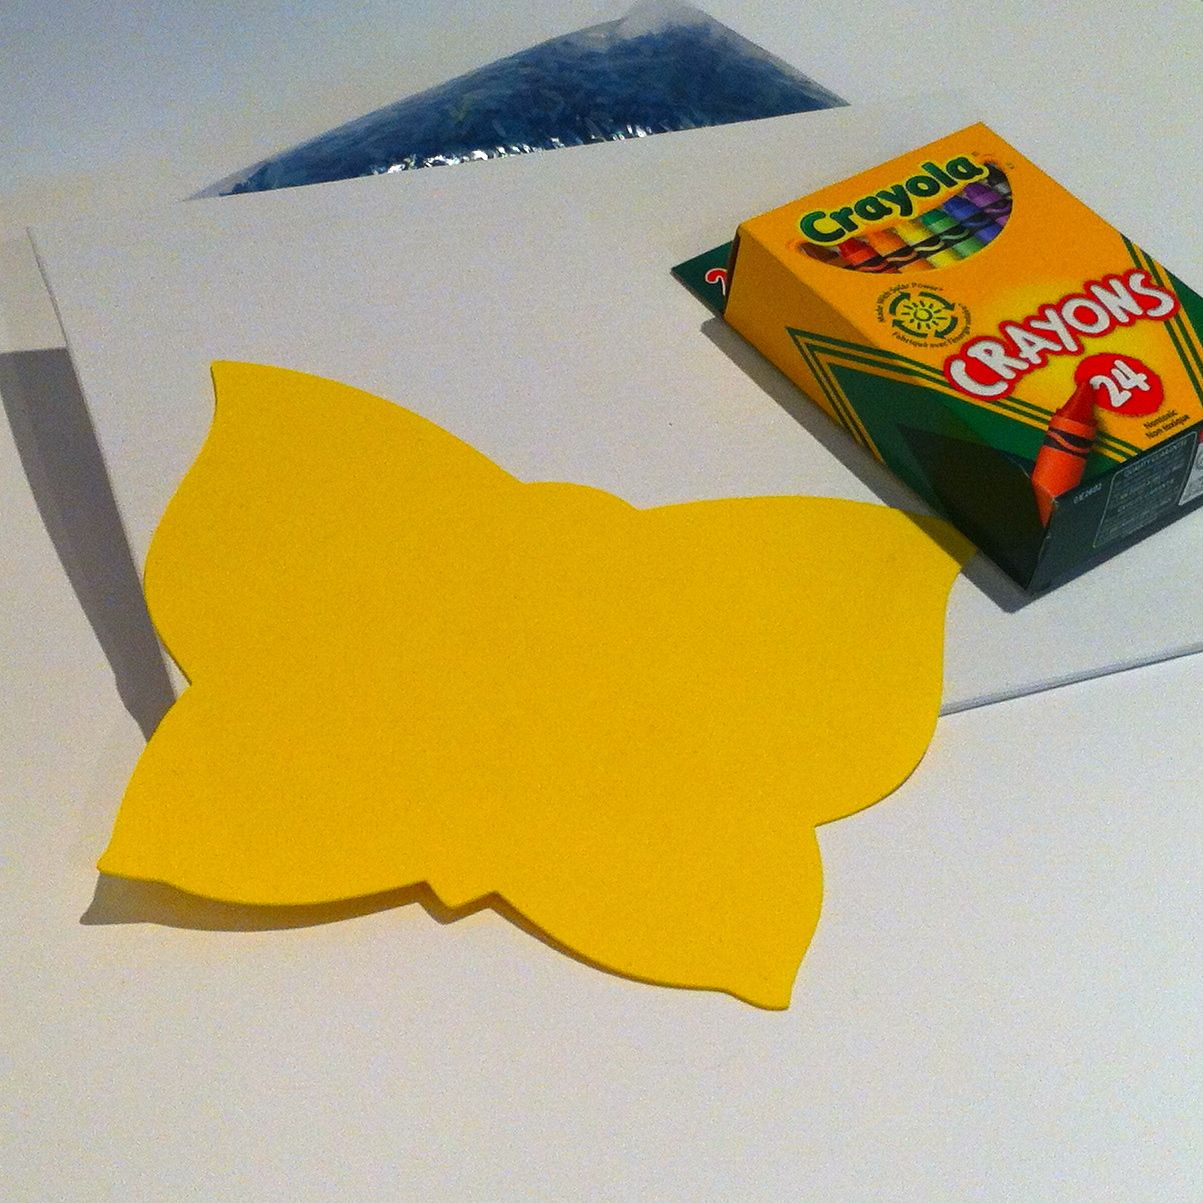
- 1 container with a Plastic lid (I used a 32oz. Plastic container from Kardish...they’re nice thick and sturdy)

- Tops (and bottoms if you can detach them) from frozen juice concentrates – I have 4 to start but plan on collecting them as I go through juice...it’s a slow process in my house

- Exacto knife

- Cutting board and/or cardboard

- Permanent Marker or stickers (optional)

Putting it all together:

1)Lay the lid for the plastic container on your cutting board or mat and use the exacto knife to cut out a rectangle measuring 3” x 1/2” (just big enough for your juice lids, aka ‘disks’).

2)Separate your metal tops and bottoms from the cardboard juice containers. Use permanent maker (or stickers!) to draw on numbers, shapes, mathematical signs, words, etc.

3)Put the lid on the plastic container.

4)Let your little one play the day away!

Eryn is a mom to a cheerful and energetic little 10 month old boy. She is a Registered Holisitic Nutritionist & accepting new clients . When she's not chasing around a baby or talking nutrition, she enjoys quilting, crafting, cooking & everything in between and blogs about those and other adventures at Bringing Back Handmade.

Enhanced by Zemanta

Rice Art

by Erin

I like to do glitter art with my niece Rhen - you know the kind: draw an image, spread some glue over a part of the image, sprinkle an appropriately colour glitter on the glue, continue with other parts/colours until the image is complete.

Rhen is in school now, and Xavier comes over two days a week to spend the day with Auntie Erin. Xavier is only 20 months old, and glitter is a bit beyond his skill set; instead of making art, we wind up just making a HUGE mess that is impossible to vacuum up afterwards. Another major concern I have about using glitter with very young children: the particles are too fine and could pose a choking hazard if they are ingested or inhaled.

Introducing rice art:

Step 1: Using the technique in the Rice Sandbox Tutorial make some coloured rice.

Other materials required: a small canvas board, a foam art shape, crayons, coloured pencils, markers or paint, craft glue.

Rice Art1
Rice Art1

Depending on the child's skill level you will need to help with some or all of the steps.

  1. Use the crayons, coloured pencils, markers or paint to create a background on the canvas board. If using markers or paint, allow to dry completely before moving on to the next steps.

2. Adhere the foam art shape to the canvas board with craft glue.

3. Spread a generous layer of craft glue over the foam art shape.

4. Sprinkle coloured rice over the glue-covered foam art shape - get creative and use as many colours as you'd like.

5. Pat down the rice, and allow the glue to set for a short time - a couple of minutes is more than enough.

6. Tip the canvas on it's edge and tap to dislodge all loose rice grains.

7. You may wish to spray a clear sealant after the glue has dried overnight.

Erin Marshall is an Angel Mama and a SAHW. Two days a week she uses her Amazing Auntie super powers to keep up with her 20-month old nephew, Xavier; the rest of her time is split between being an editor/proofreader, artist and blogger. 

Enhanced by Zemanta

GIVEAWAY: Crafts at Tag Along Toys

by Alicia E and I had the great privilege this Spring to visit Tag Along Toys and choose a craft to test out. In Karen's post in March welcoming Tag Along Toys as a Kids in the Capital sponsor, she took some great pictures of the many sections in the store. I was really excited to see the craft section in person and for E to get a chance to choose a craft of his choice.

We decided on a paper bag puppet craft kit that was age appropriate for a 3 year old.

E was super excited to take it home and get started! With a little direction, E went through the steps of gathering the stickers and cut-outs, gluing them on to the paper bag and the best part - creating his very own puppet show!

I highly recommend checking out all the amazing craft kits Tag Along Toys has in stock for children of all ages.  Thank you, Patti, for welcoming us in to your store and offering us this fun opportunity. We will be back soon for some more crafts!

Alicia is a mother of two and blogs at I Found My Feet.

GIVEAWAY DETAILS

Patti from Tag Along Toys has generously given us two Alex Craft kits (ideal for preschool age kids) to give away to our readers!

To enter leave a comment telling us what kind of crafts your kids like to do.  Contest closes on Friday June 15 at 5pm and winners must be able to go to Tag Along Toys (499 Terry Fox Drive, Kanata) to pick up the prize.

Good luck!


Enhanced by Zemanta

Flashback : paint pucks

This is one of the first posts I ever wrote for kids in the capital.  Those exact paint pucks from two years ago are still the ones we use!  :) by Lara

Do you remember these from elementary school?

I'm always looking for new crafts to do with Kiernan and when I saw these at Wallacks (I know you can also get them at Scholar's Choice) a wave of nostalgia came over me from elementary school art class and I couldn't help but pick them up. They cost about $13 for the starter pack and then you can get replacement pucks as well as other colours for when you want to mix things up.

They are awesome. We use them all the time. The colours are vibrant, there's no wasting, and best of all when this happens to your paint (and if you have a 3 year old too, the chances of this are quite high ;)....

... all you need it a little water to get the paint looking good again.

And the best part of all is the artwork you end up with at the end.

Lara is the mom to 5 year old Kiernan and 3 year old twins Quinn and Juliette. You can find her at her blog Gliding Through Motherhood.

Enhanced by Zemanta

Beading with kids

by Lara I'll readily admit that at a few months shy of three I didn't think my twins were ready to start making necklaces with beads - which is where I apparently wasn't giving them enough credit. They came home with some fun necklaces for the sitter's one day and I realized what a great activity making necklaces was for home too.

What you need:

- beads with a big opening (we have a big mix that came from garage sales and past crafting adventures my sister had, but you can easily get them at any craft store)

- something to thread the beads onto.  Yarn works with tape wrapped around the end to make it easier to thread into the beads. I also find gimp/plastic lace works really well

- Patience (the necklaces don't tend to get finished in one go and sometimes it's a lot of fun to throw the whole pile of beads on the floor and watch your mother's head explode)

It's a great activity that is fabulous for practicing hand eye coordination and the kids have a fun necklace to show off and play dress up with later.

Have you tried making necklaces with your kids?

Lara is mom to five year old Kiernan and two and a half year old boy/girl twins Quinn and Juliette.  Between the kids and her social media consulting business, she spends most of her time running frazzled.

Enhanced by Zemanta