Halloween Fun with Foam

by Natasha Halloween is just around the corner and I have been doing a variety of Halloween crafts with my son.  His favourite so far is decorating foam pumpkin stickers.

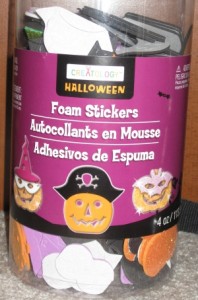
I picked up a large container of Halloween themed foam stickers from Michaels.  It contains a variety of sparkly and non-sparkly foam pumpkins, masks, hats and grass.

To get started I took out a pack of construction paper and let my son choose what colour he would like for the background.  I laid out all of the different mask, pumpkin and hat choices to make it easy for my son to pick out.

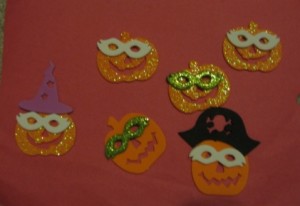
My son chose a red background then immediately began placing his collection of sparkly pumpkins all over the page. He absolutely loved decorating the pumpkins with masks.  His favourite coloured masks were the white ones.

These foam stickers are my new favourite craft to do with my son because it requires no glue or scissors, you simply peel back the paper and stick.  This allows your child to create his own masterpiece without the messy clean up.

What is your favourite Halloween craft?

Natasha is a new mommy to her first born, Baby H. She runs ShopHaven, a blog that reviews products and profiles local businesses and individuals from the Ottawa area. Natasha is also the creative force behind ShopHaven Baskets; a highly customized gift baskets service.

Enhanced by Zemanta

Arts and Crafts: Making Baby Chicks

by Natasha Rainy days are perfect for making crafts with your little one. This year, we seem to be having more rainy days of summer than hot ones, so Baby H has grown used to seeing the arts and crafts box pop up at least once a week.

A while ago, I came across Frugal Family Fun Blog, a site offering free downloads of craft projects for children. One of the first projects Baby H and I embarked upon was making baby chicks. It’s basically gluing, painting and putting things together.

If you’re looking to do some arts and crafts with your little one, I recommend this easy project.

I pre-cut two circles out of yellow paper, orange triangles for the feet and the beak and cut up the feathers into small pieces. This is to help along with the project, since Baby H - at 22 months old - may lose interest if we spent too much time doing prep work together.

I watched as Baby H glued the  two yellow circles onto a colourful piece of construction paper, a large circle for the body and a smaller one for the head. Next, he painted the body of the chick with yellow paint and set it aside to dry. Once ready, Baby H glued the small bits of feathers and pompoms onto the chick’s body.  He was fascinated by the glue, and was a little too eager to stick everything together. I had to glue on the chick’s legs, feet and beak myself to make sure that they end up in the right places. I didn’t particularly feel like inventing a new brand of birds and explaining the modified chick to my son later on.

Baby H helped  glue the remaining parts and the googly eyes, which he kept giggling at.  At the end of it all, my son had learned a few new things, made himself a chick and I got to spend some time with him on a rainy Saturday afternoon.

Arts and crafts are really important to me, and I think all of us really, because they help us see the artistic potential of our children early on.  And once in a while, it’s fun to do something really messy and end up stuck to all sorts of things.

Natasha is a new mommy to her first born, Baby H. She runs ShopHaven, a blog that reviews products and profiles local businesses and individuals from the Ottawa area. Natasha is also the creative force behind ShopHaven Baskets; a highly customized gift baskets service.
Enhanced by Zemanta

Easter chick craft

By Vicky The Spring season is so rich with learning opportunities and art ideas for children! Flowers are blooming, birds and insects are plenty, and Easter is around the corner.

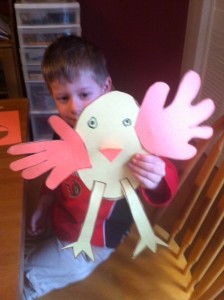
Here is an easy, and very cute craft you can whip up with your kids to help decorate for Easter! You could also turn it into an Easter card. This craft is perfect for kids aged 3-6 years.

Supplies needed

-Yellow and orange construction paper -glue and scissors -markers and googly eyes if you want

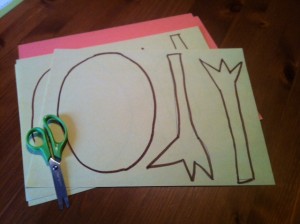
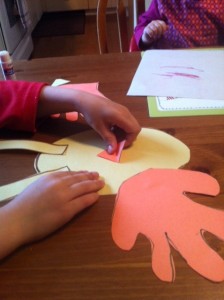
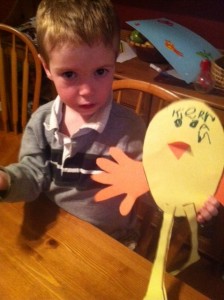
On a piece of yellow construction paper, draw an egg (the chick's body) and two bird's feet (making the legs long so they dangle off the body). Let your child cut them out, or you can cut them ahead of time and let them do the glueing. Glue both the legs at the bottom of the egg. On a piece of orange construction paper, have your child trace both of his hands with fingers spread. Once cut out, these will be the chick's wings. Glue the wings on the sides of the egg.

Next cut a diamond from orange construction paper, fold it in half and glue it in the centre of the egg so that it opens like a bird's beak.

For the eyes, your child can draw his own, or use googly eyes, or even just cut out black circles from construction paper.

If you want to get even more creative, you can use brads as hinges for the wings and legs!

There you have it, an Easter chick!

Vicky is the mom to 4 year old son named Joel and 20 month old daughter named Mieka. You can read her blog at blog Some Kind of Mom.

Enhanced by Zemanta