Fall tye-dye cupcakes

by Carly

I really wanted to make something nut-free for the Little Man to eat for dessert at our Thanksgiving dinner tomorrow.  Since I knew the pie I was bringing had nuts, I decided to make some fall-themed cupcakes.  I didn't have time to fuss with fondant, creating fancy turkeys or pilgrim's hats (not that we really do the pilgrim thing here in Canada anyway).

Since Jake really likes rainbow coloured cakes and cupcakes, I used that as my jumping off point.  We made white cake batter, then divided the batter into three bowls.  One bowl of batter was tinted yellow, one orange and one terra-cotta (I'd run out of red but had terra-cotta lying around for some reason).  I used food paste as you need less of it to get a nice strong colour.

To make it easier to get the batter into the cupcake liners, I put it in plastic baggies and snip a tiny bit off one corner.  I started with the lightest colour, pouring some into each cup.  Then we added the orange and finally the terra-cotta.  Don't mix the colours as the batter will turn out muddy - just leave them "piled" on top of one another.

While the cupcakes were baking in their plain white cupcake liners, I nosed around our cupboards looking for some pretty fall-themed liners to put them in for added colour, but I came up empty handed.  So I tinted some extra white liners I had with yellow, orange and terra-cotta food paste mixed with water.  Using a spoon I poured the different colours over the liners while they sat upside down on a wire rack nestled in a rimmed cookie sheet to catch the run-off.

I didn't want to completely cover the liners, so I left a fair bit of white showing.  When I had tinted all the liners, I poured any excess dye off them, then put them right side up in a cupcake pan.  After taking out the baked cupcakes, I turned the oven off and put the liners into the warm oven to help them dry.  Keep a close eye on them - they only need a minute or two.  The bottoms were still damp, so I turned them upside down on the wire rack and popped them back into the still warm oven for another minute or two.

While the cupcakes cooled I made some buttercream frosting and divided that into three bowls.  I coloured each bowl using the same colours I'd used in the batter.  Each colour was then put into it's own individual piping bag and twisted closed at the top using a twist-tie.  I loosely attached the three bags together around the middle using a pipe cleaner, and put all three into another piping bag with my largest round tip attached.

I did a test swirl on a plate to make sure the three colours would come out nicely and fairly uniform, then piped the cooled cupcakes, starting at the outer edge and moving toward the middle.

Ta-da!  Tye-dyed cupcakes with tye-dyed frosting and tye-dyed decorative liners.

Carly has red hair and occasionally the temper to match.  She loves potatoes, rainy nights, photography, her husband, her 6 year old son, Jacob and her 10 month old son, Noah.  Probably in reverse order.   She also blogs.

Flashback: OAMC, or simply put, Freezer Cooking

This was one of our very first posts on the blog but I've been thinking about it a lot lately as I try to figure out how to not only avoid takeout by being more efficient but also figuring out ways to save money on groceries. ~Lara by Jenn

I am very happy to write my first post as a contributor to this Blog!  I really believe that this blog will be a great way to help other parents in the Ottawa area in many, many ways!  I am not very good with figuring out new things to do with my kids (Jacob - 5, Zachary - 2.5), but I realized today that I do have something important to share.  Once a Month Cooking, also called Freezer Cooking.

Over the past 4 years since going back to work after my first child, I have struggled with getting proper, healthy meals on the table after getting home for the day after 5pm.   Then, last October, a friend posted something on Facebook about a place you could go to where you choose a certain amount of meals and then prepare those meals right there at the store.  They provide everything you need and have everything all ready to go.  You just have to follow a recipe and dump ingredients into Ziplock bags.  It sounded great!  I decided to give it a try.  It was a lot of fun, but it was also pretty expensive.  I justified it by convincing myself that we would end up saving money by not going out to eat. I thought I would just go once a month and make 6-9 meals.  Shortly after, I realized that we would not be able to do this regularly.  The cost was just too high.

Skip forward to February.  A different friend posted on Facebook how she had just made 12 meals in one day.  I immediately drilled her on how she did this.  It was that day that I was introduced to Once a Month Cooking / Freezer Cooking.  She suggested two books for me to have a look at - The Big Cook and Fix, Freeze, Feast.  I researched both books and decide I needed both of them ASAP!   So I ordered them online from Chapters.ca.  The day they were delivered, I went crazy planning my menu for the next little while, preparing a grocery list, and ultimately went shopping at Costco and Bulk Barn for my ingredients.  That first night, I had prepared 3 meals of Basil Balsamic Chicken Breasts.  It took me no more than 15 minutes of work.  We had one that night and two more went into the freezer.  I went about three days in a row doing this and then spent a Saturday afternoon making about 8 meals.  It was great!  I had 12 meals in the freezer ready to go.  All I needed to do was put it in the fridge to thaw in the morning or night before and I had dinner figured out.

Freezer cooking is not only a great way to plan meals and have something ready for dinner every night, it is also a great way to save money.  If you are a Costco shopper, this is definitely a great thing to do.  You can buy big trays of meat and use it all at once to make many meals and not be afraid of wasting.  You can watch for sales and save even more money.  I tell you, once you start, you can become a little obsessed with it!  I started seeing meat and thinking "What can I make with this".  By the beginning of March, my freezer was packed with about 30 meals.  :)  Obsessed I was!  But we have been eating GREAT food and I have been saving us money!  Win, win!

Stay tuned for more adventures in Freezer Cooking!

Jenn is mom to five-year old Jacob and two and a half year old Zachary.

Have you ever tried once a month cooking? Do you have any tips to share?

Recipe: J's French Toast

by AmandaY My 5 y.o. son is a picky eater.  I admit this freely and try to accommodate his preferences and introduce new things slowly but surely. (last week we had a breakthrough with pineapple!)  He has issues with smell, texture, colour, and must know every detail about what it is that he's eating.  I do strive to feed him food that he likes however.

This is my own recipe for French Toast.  I don't own the copyright or anything but it's the balance of flavour that I enjoy and he will eat and then ask for more!  That's all a parent really wants, is to see their kids eat!  I love to make this on weekends when we have time to cook in the kitchen together.  He's an expert mixer, soon he'll be ready to learn to crack the eggs!  His favourite part is the eating, and really can you blame him??

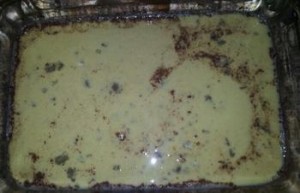
5 eggs 1/4 cup of milk 1 tsp vanilla 1 tsp cinnamon 1/4 tsp nutmeg 6-8 slices whole wheat bread (at least day old works best) 1-2 tbsp vegetable oil

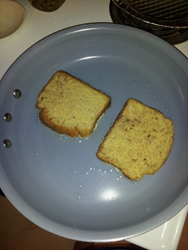
The key to this recipe is to preheat your pan then lower the temperature to about medium or slightly lower.  Don't crowd the pan, I use a fairly large skillet and only two slices at a time.  Halfway through, add some fresh oil.

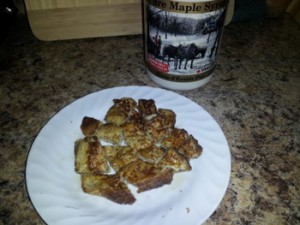
Serve with *real* maple syrup and your choice of fruit!  My picky eater likes bananas, but they can't be on the same plate as the toast.  :)

Amanda was born and raised in Ottawa where she continues to live with her husband and son “J”. Amanda is bilingual and interests include reading, blogging, socializing, and advocacy on children and teen issues.

Enhanced by Zemanta

Kid in the Kitchen

by Amy When I was a kid, my sister and I used to go over to a friend's house and her dad would gather us in the kitchen and we would make bread. I don't remember exactly how involved we were in the pre-dough stage, but we got to make our bread into shapes and then he would bake them and we would eat them. I knew when my kid started being able to help out in the kitchen – and being very excited to help out – that bread was going to be one of our projects.

Today she was looking for something to do and I decided it might be the right day. I found a recipe online (from Jamie Oliver) and we went out to get our ingredients.

When we got back into the kitchen she was a little impatient as I read through the recipe and figured things out, but once we got started she got her hands right in.

It was a little messy:

...But once it was time to knead the dough, she knew exactly what to do.

The problem with making bread is that you have to let it rise twice, so instead of just mixing, baking and then eating, there is a bit more of a wait, but we got through that extra time with a bit of a dance party.

Eventually the bread came out of the oven.

It smelled like bread and it looked like bread, but we had to taste:

I think she approved.

(And while we had all the ingredients out, and since we had bought yeast, we made some baked doughnuts too...

Amy is mom to two year old Maggie and a 6 year old schnauzer named Henry. You can read her blog at amyboughner.ca where she writes about motherhood and anything else that’s on her mind. She also shares a blog with her husband at boughner.ca where they talk together about parenting a daughter.


Enhanced by Zemanta

Going Bananas Over Allergy-Free Desserts (egg/dairy/nut/sesame/soy/wheat/gluten-free)

by Meghan Allergy-free and kid-friendly can pose a real challenge in the food department. When it comes to kid-friendly and allergy-free desserts the choices are limited unless you want to spend a lot of time in the kitchen. Allergy-free baking can be tricky (as with regular baking) and a lot of moms want easy – not everyone is a Martha Stewart.

It is difficult to find easy pre-made allergy-free desserts as they usually cater to only one food allergy or they are ridiculously expensive. I remember bringing home a $30 allergy-free cake to treat my family only to have my 3-year-old exclaim it looked yucky and the baby toss it on the floor.

When you want to treat your little ones and you don’t want all the mess/work, I say grab a banana. I live with a bunch of monkeys, so bananas do not last in the fruit bowl. I end up making a second trip to the grocery store to replenish what was eaten. Even the pickiest of eaters seem to be okay with a banana, so why not make a quick dessert from it? You can even get your picky eater involved!

Now you may wonder how a simple banana could be transformed into an easy dessert without just looking like a boring banana – “yippee mom, bananas again for dessert”.

Here are 5 ways to get your kids going bananas for these banana inspired allergy-free desserts:

Banana Sushi

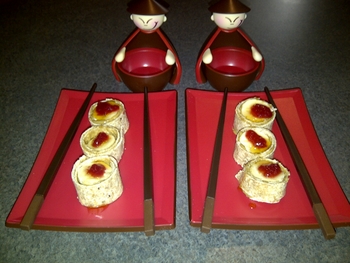
As adults, we just love to use chopsticks even though we could take the simple route and grab a fork. My oldest daughter is fascinated by chopsticks, but wouldn’t touch real sushi. When she saw that I was rolling up some bananas for dessert, she was ready to use those chopsticks.

Directions: Slice 1.5 inch wide strips of a tortilla wrap. Spread sunflower seed butter (I use SunButter) on one side of the strip. Slice 1.5 inch piece of banana and place on one end of the buttered strip. You are then going to roll the banana into the strip. I topped each of the rolls with a little bit of raspberry jam to mimic fish eggs on real sushi.

Banana Boat

Why dirty a bowl when you have a banana?

Directions: Carve out lengthwise the top of the banana. Take a spoon and scrape out some of the banana and place in a bowl (you want to create a partially hollowed cavity in the banana). Mix 1 tbsp of brown sugar, 2 tbsp of oats, and 1 tsp of butter spread (I use Earth Balance – vegan) into the bowl with banana. Mash all together and place back into hollow cavity of banana. Top with dairy-free chocolate chips (I use Enjoy Life brand). Place in oven for 10 minutes at 375F (you can make a little stand from aluminum foil). Banana skin will turn a bit black, but insides will be all warm and gooey.

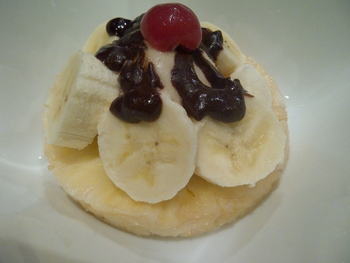
Banana Sundae

A simple summer treat!

Directions: Slice a pineapple and place ring at bottom of bowl. Place one scoop of sorbet in the middle of pineapple ring. Slice banana and layer around sorbet. Melt a few tbsps of dairy-free chocolate chips (I use Enjoy Life brand) with one tbsp of rice milk (or any other choice of milk) in microwave – stir. Pour chocolate sauce over sorbet and bananas. Top with a cherry.

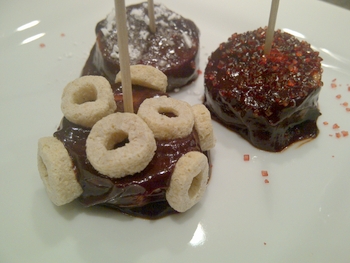
Banana Chocolate Fondue

Kids love to get involved and decorate.

Directions: Slice bananas in 2 inch pieces. Melt dairy-free chocolate chips (I use Enjoy Life brand) with rice milk (or any other choice of milk) in microwave – stir (1 tbsp of milk for every 3 tbsp of chocolate). Dip banana pieces into melted chocolate and place on plate. Put toothpick in top of banana piece. Let kids decorate with sprinkles or cereal.

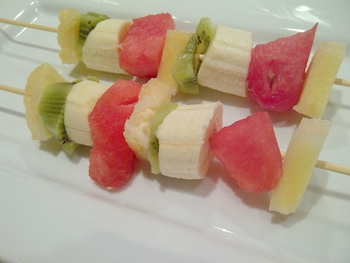
Banana Fruit Stick

The easiest and healthiest of all desserts, but children just love anything on a stick! My daughter wouldn’t touch kiwi, but since I put it on a stick next to the bananas, she didn’t make any mention of hating it.

Directions: Cut up bananas, watermelon, kiwi, pineapple, or any other fruit on hand and place on a skewer.

Meghan is the mother of 2 beautiful girls aged 1 and 3. She has been recently diagnosed with Ankylosing Spondylitis which is a form of arthritis. In the process she has discovered that diet severely influences her symptoms as she is intolerant to dairy, gluten, eggs, and corn. She blogs about her daily challenges with dietary restrictions at Bon Appetit Allergy Free Treats and you can also follow her on Twitter .